目次
iOS で Extension を使ったプッシュ通知の拡張
iOS 10 以降で追加されたプッシュ通知の拡張についてご紹介します。
Notificaton Service Extension および Notification Content Extension を使って通知の内容を拡張することができます。
Extension の全般的な注意事項
Extension には Notificaton Service Extension および Notification Content Extension に限らず、メモリの上限値が低く設定されています。大きなデータの取り扱い方法や、使用するライブラリのメモリ消費、View階層の深さなどに留意しましょう。
Extension のプロファイルを作成
Extension にもプロファイルの作成が必要となります。iOSでのプッシュ通知の準備を参考に、以下のようなプロファイルを作成します。
- App ID の作成で App ID を作成します。
- App ID Suffix は、アプリ本体の Bundle ID よりも下の階層になるような命名にする必要があります。
- 例えば、
com.fenrir-inc.BoltzMessengerの Notification Service Extension であればcom.fenrir-inc.BoltzMessenger.NotificationServiceのようにする必要があります。 - App Services で Push Notification を有効にする必要はありません。
- 作成した App ID 用のプロビジョニングプロファイルを作成します。
アプリに Extension を追加する
アプリに Extension を追加するには、Xcode の Project Navigator ツリー上でプロジェクトを追加し、ターゲットの一覧の一番下にある[+]ボタンをクリックします。

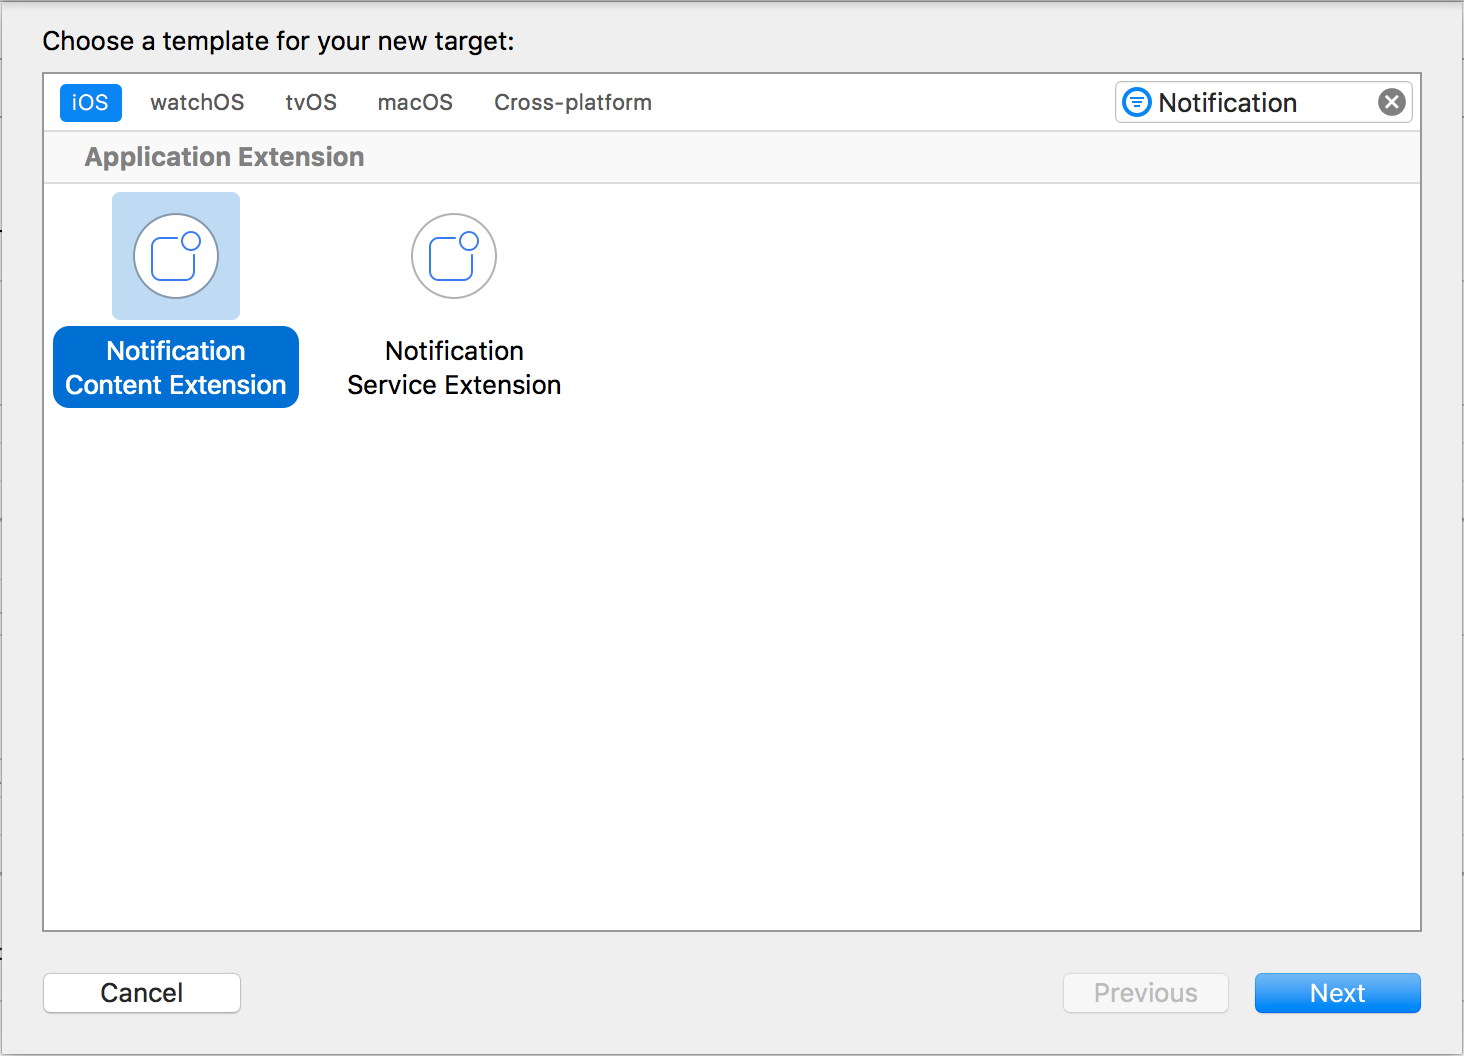
作成したい Extension を選択します。
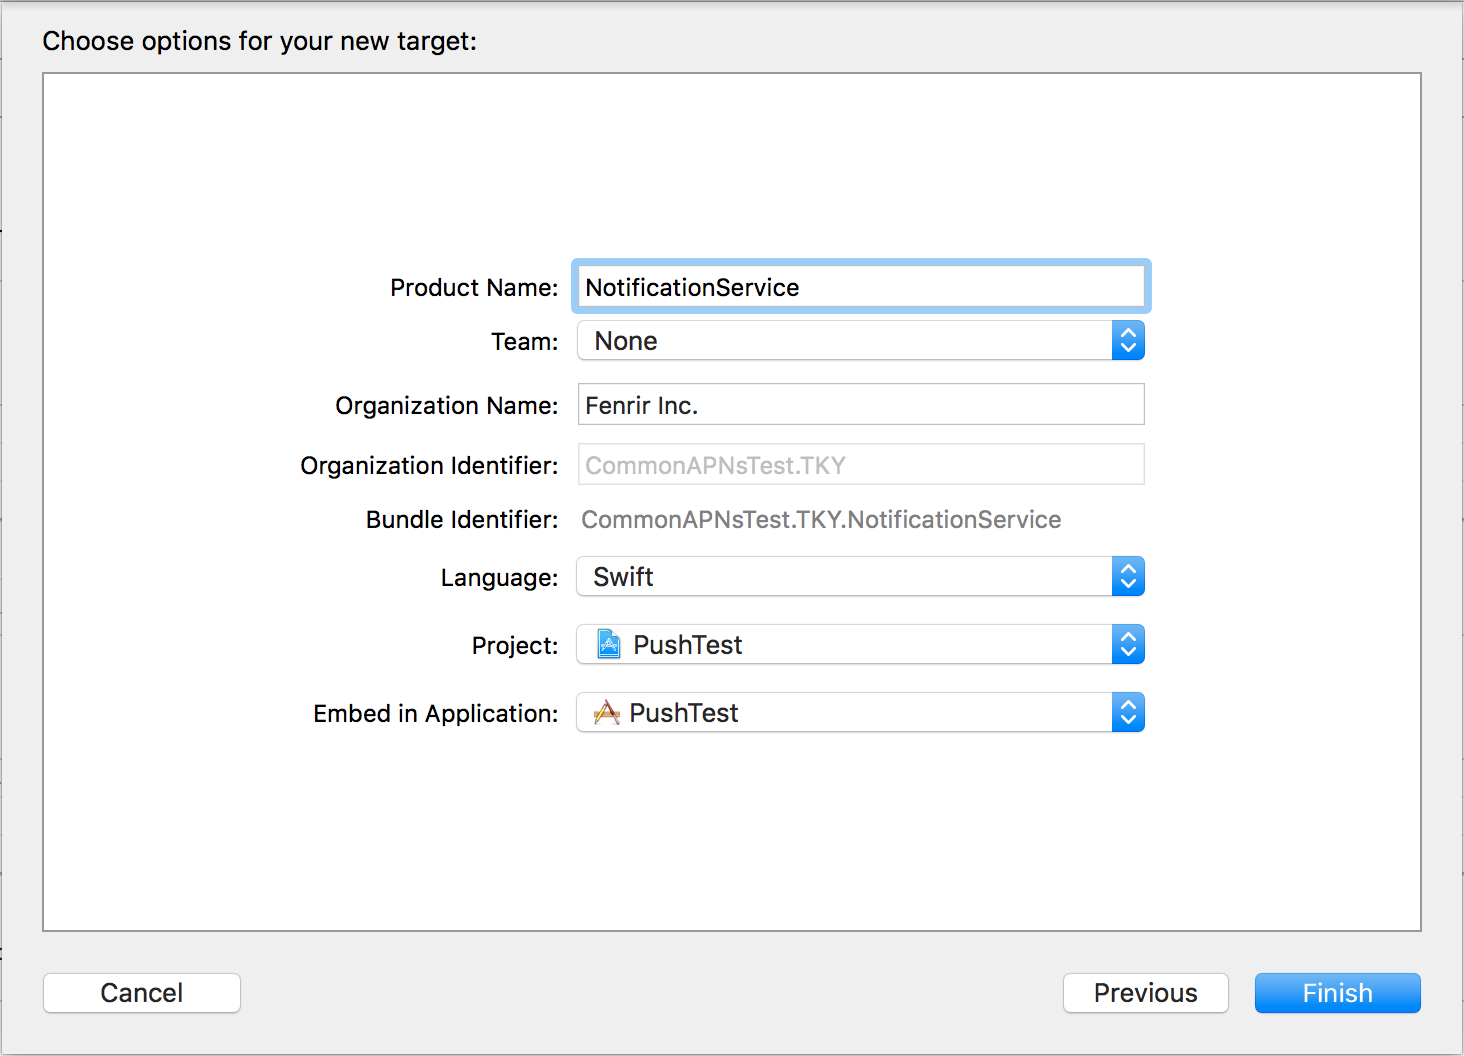
次の画面で、作成する Notification の名前を指定します。Bundle Identifier は既定でアプリの Bundle Identifier+Product Name になりますが、必要があれば後ほど別途設定することも可能です。
Notification Service Extension を使ったリッチプッシュの実現
Notification Service Extension はプッシュ通知受信時、プッシュ通知を実際に表示する前に実行され、表示される通知の内容を加工することができます。
この加工の中で通知に画像・音声・動画を追加することができます。追加できるファイルのサイズの種類と上限は UNNotificationAttachment を参照してください。
なお、Notification Service Extension は端末の電源状況などにより必ずしも実行されない場合があることに留意が必要です。
UNNotificationServiceExtension の実装
Notification Service Extension を追加すると、UNNotificationServiceExtension を実装したテンプレートファイルが作成されます。このクラスは didReceive(_:, withContentHandler:) メソッドと serviceExtensionTimeWillExpire が実装されています。
didReceive メソッドでは、実際にコンテンツの中身を書き換える処理を記述します。テンプレートファイルは以下のような内容になっており、// Modify the notification content here... と書かれている箇所で通知の内容を変更します。
 1override func didReceive(_ request: UNNotificationRequest, withContentHandler contentHandler: @escaping (UNNotificationContent) -> Void) {
 2    self.contentHandler = contentHandler
 3    bestAttemptContent = (request.content.mutableCopy() as? UNMutableNotificationContent)
 4
 5    if let bestAttemptContent = bestAttemptContent {
 6        // Modify the notification content here...
 7        bestAttemptContent.title = "\(bestAttemptContent.title) [modified]"
 8
 9        contentHandler(bestAttemptContent)
10    }
11}
例えば、プッシュペイロードに入っている image_url の画像をダウンロードする場合は以下のように記述できます。
 1override func didReceive(_ request: UNNotificationRequest, withContentHandler contentHandler: @escaping (UNNotificationContent) -> Void) {
 2    self.contentHandler = contentHandler
 3    bestAttemptContent = (request.content.mutableCopy() as? UNMutableNotificationContent)
 4
 5    if  let bestAttemptContent = bestAttemptContent,
 6        let urlString = request.content.userInfo["image_url"] as? String,
 7        let url = URL(string: urlString) {
 8        URLSession.shared.downloadTask(with: url, completionHandler: { (location, response, error) in
 9            if  let loc = location ,
10                let attachment = try? UNNotificationAttachment(identifier: "image", url: loc, options: nil) {
11                bestAttemptContent.attachments = [attachment]
12            }
13            contentHandler(bestAttemptContent)
14        })
15    }
16}
タイムアウト時の処理
ダウンロードに時間がかかるなどして、Extensionの実行時間の上限に達した場合、serviceExtensionTimeWillExpire メソッドが実行されます。想定通りの形ではなくても、通知だけはとりあえず表示させるということがこちらの処理で可能です。
1override func serviceExtensionTimeWillExpire() {
2    // Called just before the extension will be terminated by the system.
3    // Use this as an opportunity to deliver your "best attempt" at modified content, otherwise the original push payload will be used.
4    if let contentHandler = contentHandler, let bestAttemptContent =  bestAttemptContent {
5        contentHandler(bestAttemptContent)
6    }
7}
通知の送信
Notification Service Extensionを起動するには、通知ペイロードにaps.mutable-content属性を指定する必要があります。
 1{
 2  "aps": {
 3    "alert": {
 4      "title": "新しい写真",
 5      "body": "新しい写真がシェアされました"
 6    },
 7    "mutable-content": 1
 8  },
 9  "image_url": "http://service.example.com/image/img10000.jpg"
10}
Notification Content Extensionを使った詳細表示の拡張
Notification Content Extension は、通知の詳細表示(3DTouch搭載機の場合は通知の押し込み、非搭載機の場合は右にスライドして[表示]をタップ)の内容を任意の表示にすることができる機能です。
UNNotificationContentExtensionを実装したViewControllerの実装
Notification Content Extensionを追加すると、NotificationViewController という、UNNotificationContentExtension プロトコルを実装した UIViewController のクラスファイルと、Storyboardファイルが追加されます。
表示されるコンテンツはStoryboardで編集します。
Viewの表示前に didReceive(_:) メソッドが実行されますので、通知の内容に合わせてUIの内容を更新します。
 1class NotificationViewController: UIViewController, UNNotificationContentExtension {
 2
 3    @IBOutlet var label: UILabel?
 4
 5    override func viewDidLoad() {
 6        super.viewDidLoad()
 7        // Do any required interface initialization here.
 8    }
 9
10    func didReceive(_ notification: UNNotification) {
11        self.label?.text = notification.request.content.body
12    }
13
14}
通知カテゴリの登録
Notification Content Extension を使用する場合および通知に対するアクションを指定する場合は、通知のカテゴリを登録する必要があります。
まず、この Notification Content Extension を使用する通知のカテゴリを指定します。Extension を追加した際に作成されたInfo.plist を開き、NSExtension.NSExtensionAttributes.UNNotificationExtensionCategory にカテゴリ名を指定します。

次に、アプリ本体で通知の送信が許可されたタイミングでカテゴリを登録する処理を記述します。
1let category = UNNotificationCategory(identifier: "myNotificationCategory",
2                                      actions: [],
3                                      intentIdentifiers: [],
4                                      options: [])
5UNUserNotificationCenter.current().setNotificationCategories([category])
通知の送信
Notification Content Extension を起動するには、通知ペイロードに aps.category 属性を追加し、登録したカテゴリを指定します。
 1{
 2  "aps": {
 3    "alert": {
 4      "title": "新しい写真",
 5      "body": "新しい写真がシェアされました"
 6    },
 7    "category": "myNotificationCategory"
 8  },
 9  "image_url": "http://service.example.com/image/img10000.jpg"
10}